Interior Rendering: The Complete Guide [2026]

Interior rendering is how architects, designers, and homeowners see a space before it's built or renovated. It shows the finishes, the light, and the way a room actually feels to stand in. A floor plan tells you where the kitchen island goes. An interior render tells you whether the room works.
This guide covers everything you need to know about interior rendering in 2026, from traditional workflows to AI-powered tools that can produce photorealistic rooms in seconds.
What Is Interior Rendering?
Interior rendering is the process of creating a realistic image of a space's inside. It shows the materials, lighting, furniture, and spatial relationships that make a room read the way it will once it's finished. It's how a client decides between two flooring options, how a developer sells an unbuilt unit, and how a homeowner finally pictures their renovation.
Interiors are, in some ways, harder to render than exteriors. Rooms are enclosed, so light bounces and mixes in complicated ways. Cameras sit close to surfaces, so materials are seen up close and have to hold up to scrutiny. A space without furniture reads as ambiguous, because empty rooms feel cold and make scale hard to judge. Getting an interior right is mostly about getting light right.
Why Interior Renders Matter
Interior renders serve several distinct audiences.
For architects and designers, renders communicate spatial intent faster than a section drawing ever could. They show ceiling height, proportion, sightlines, and how daylight moves through a room.
For interior designers, renders are the core decision tool. Finishes, furniture, and color palettes get signed off in a render before anyone places an order, which is exactly when changes are cheap.
For real estate and staging, renders turn empty listings into furnished, livable spaces. Most buyers can't furnish a room in their head, so virtual staging does it for them.
For homeowners and renovators, renders take the guesswork out of kitchen and bath decisions. Choosing a countertop from a small sample is hard. Seeing it applied to your actual room makes the choice obvious.
Types of Interior Rendering
Photorealistic Rendering
The goal is an image indistinguishable from a photograph, with accurate materials, physically believable lighting, and styling that makes the room feel lived-in. These are what clients expect for final presentations and marketing. (For a deeper dive on what separates real-looking renders from the uncanny valley, see our photorealistic rendering guide.)

Conceptual and Mood Rendering
Conceptual renders are looser, more atmospheric interpretations used in early design phases. They might use stylized materials or simplified furniture to communicate a feeling, whether warm and rustic or bright and minimal, without committing to exact specifications.
Real-Time Rendering
Engines like Enscape, Lumion, D5 Render, and Twinmotion render interiors in real time, letting designers walk through a space and adjust cameras on the fly. Quality has improved dramatically and is often client-ready, though it still trails dedicated offline renderers for hero images.
AI Rendering
AI rendering is the newest category. These tools accept an image or a 3D model and generate photorealistic interiors in seconds rather than hours. Quality varies by tool, but the best results are now production-ready for many interior use cases.
Virtual Staging
Virtual staging is a specifically interior use case. It means furnishing an empty or unbuilt room so it reads as a place someone could live. Traditionally this was a Photoshop job, but it is increasingly handled by AI. There is an important distinction here between staging your actual space and inventing a new one, which we'll come back to.
Traditional Interior Rendering Workflow
The conventional workflow for interior rendering looks like this.
1. Create or obtain a 3D model. Build it in SketchUp, Revit, Rhino, ArchiCAD, or 3ds Max. The model needs accurate room geometry and basic material assignments.
2. Export to rendering software. The model moves to a dedicated renderer such as V-Ray or Corona, or it stays in-app if you use an integrated real-time solution.
3. Set up materials. Assign physically accurate finishes with proper reflectivity, roughness, and texture mapping. Interiors are seen up close, so this step matters more than it does outside. A flat wood texture that passes from across the street falls apart on a close-up of a floor.
4. Configure lighting. Place artificial fixtures for ambient, task, and accent light, set the daylight coming through windows, and balance the two. This is where interior renders are won or lost.
5. Position cameras. Find angles that show the room without distortion. Interiors usually need a wider field of view than exteriors, which introduces its own pitfalls.
6. Render. Hit the button and wait. A single high-quality interior render might take 20 minutes to several hours, depending on complexity, lighting, and hardware.
7. Post-process. Adjust exposure, recover blown-out windows, add styling props and people, and warm up the image in Photoshop.
This workflow produces excellent results, but it requires specialized skills and a significant time investment.
AI Interior Rendering: A Faster Alternative
AI rendering tools have changed the economics of interior visualization. What once required hours of lighting setup and rendering now happens in seconds.
Most AI rendering tools work from screenshots or 2D images. You export a view from SketchUp, upload it, and receive a rendered version. This works, but it has limitations that bite especially hard indoors. You typically photograph a single room from several positions, into one corner, then the other, then a detail of the island or the vanity, and every one of those angles means another export from your modeling software.
A second category is worth separating out: AI interior-design apps that reimagine a room from a photo. These take a picture of an existing space and generate a redesigned version with a new layout, new furniture, and sometimes new walls. They're great for inspiration, but they invent a space rather than render your space. If the geometry you carefully modeled gets reinterpreted, the render no longer answers the question that matters: what will this design look like when it's built?
ArchRender: Image Upload or 3D Model Import
ArchRender works both ways, and you don't need a 3D model to get started.
If you only have an image, such as a screenshot from your modeling software, a photo of an existing room, or a flat 2D view, you can upload it and generate a photorealistic render in seconds, exactly like other AI tools. Nothing about ArchRender requires a model.
What sets it apart is the option to go further. If you do have a 3D model, ArchRender imports your actual files in OBJ, FBX, or GLB format. Rather than reinventing your room or locking you to a single screenshot, it preserves your real geometry so you can render the space from any angle.
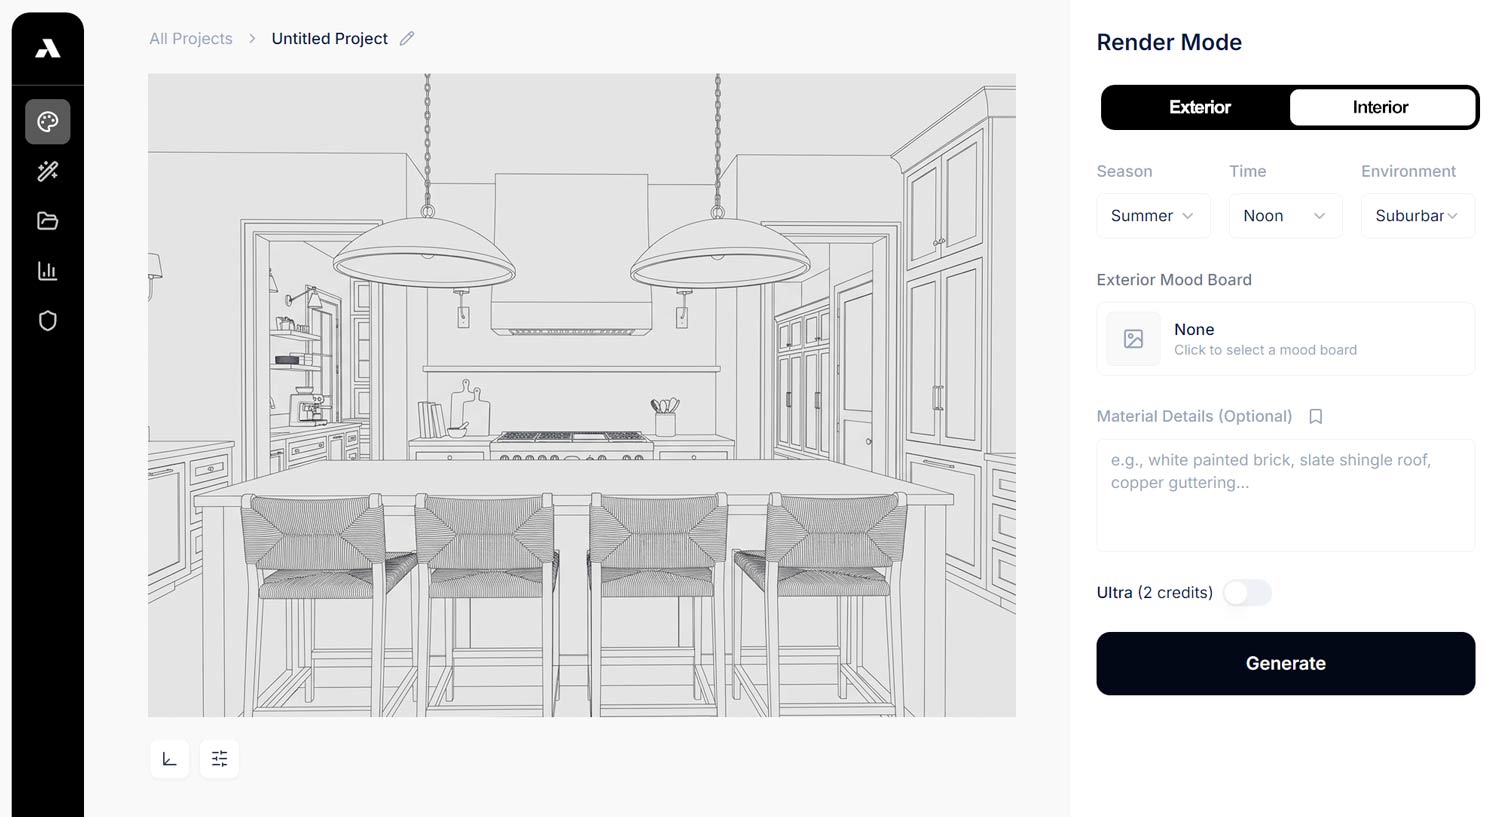
Upload once, then render from any angle. The geometry, materials, and spatial relationships stay intact. Need the kitchen from the entry, from the dining side, and as a tight shot of the backsplash? You can generate them all without returning to your modeling software, and the layout stays true to what you designed.
This matters more for interiors than almost anywhere else. A room is a tight, enclosed space that has to be shown from multiple positions to be understood, and the whole point of an interior render is usually to confirm a real decision about a finish, a fixture, or a furniture plan. Preserving your actual geometry is what keeps the render honest.
How it works:
If you only have an image: Upload your photo or screenshot, describe the look you want, and generate a render in seconds.
If you have a 3D model:
Export your room from SketchUp, Revit, Rhino, ArchiCAD, or any software that outputs OBJ, FBX, or GLB.
Upload it to ArchRender.
Position your camera anywhere inside the space.
Generate a photorealistic render in seconds.
Adjust the camera and render again, with no re-upload needed.
For SketchUp users, there's also a direct extension in the SketchUp Extension Warehouse that streamlines the export.
Interior Rendering Costs
Traditional Rendering Services
Outsourcing to a rendering studio typically costs the following:
Basic interior render: $250–$500
High-end photorealistic render: $600–$1,500+
Full package (multiple rooms and angles): $2,000–$8,000+
Virtual staging (per image): $25–$100
Turnaround is usually 3–7 days for standard work.
In-House Traditional Rendering
If you're rendering yourself with traditional tools, the costs look like this:
Software: $500–$2,000 per year for professional renderers
Hardware: $2,000–$5,000+ for a capable workstation
Time: 2–6 hours per high-quality interior image, much of it on lighting
AI Rendering
AI tools have compressed these costs dramatically:
Per-render pricing: some tools charge $1–$5 per image
Subscription pricing: $20–$100 per month for high-volume rendering
Time: seconds to minutes per render
For designers iterating on finishes and furniture across multiple rooms, AI rendering can cut visualization costs by 90% or more.
Best Practices for Interior Rendering
Lighting (Get This Right First)
Interiors live or die on lighting more than any other factor.
Layer your light. Combine ambient light for overall fill, task light for areas like under-cabinet and reading zones, and accent light for wall washes and art. A single ceiling source reads flat and institutional.
Mix daylight and artificial light. Natural light through windows gives a room life, and interior fixtures give it warmth. The most convincing interiors use both.
Mind color temperature. Warm light (2700–3000K) feels residential, while cool light (4000K and up) feels clinical. Fighting temperatures in one room is a dead giveaway.
Balance window exposure. Expose for the interior and the windows blow out; expose for the view and the room goes dark. The best renders hold detail in both, the way a good photographer brackets exposure.
Camera and Lens
Go wide, but not too wide. Interiors usually need a 24–35mm equivalent field of view to capture a room. Push past that and you get fisheye distortion that makes the space feel warped and untrustworthy.
Keep verticals vertical. Two-point perspective, where vertical lines stay parallel, reads as more accurate for architectural interiors.
Shoot into corners. Angling toward a corner shows two walls and reads with more depth than facing a single flat wall.
Mind camera height. Roughly 4–5 feet works for most rooms, and a lower camera can make living spaces feel more relaxed and intimate.
Materials and Detail
Interior surfaces are seen up close, so fidelity matters.
Flooring should show believable grain, plank joints, or tile grout rather than a repeating flat texture.
Textiles such as sofas, rugs, drapery, and bedding need visible weave and softness.
Reflective surfaces like countertops, glass, mirrors, and polished floors must reflect something that makes sense in the room.
Pattern scale matters, because wallpaper, tile, and fabric patterns should be sized realistically. Oversized patterns instantly look fake.
Styling and Composition
Furnish the space. Empty rooms feel cold and read as ambiguous in scale, while furniture, rugs, and props establish both.
Use the rule of thirds. Offset the focal point rather than centering everything.
Add foreground depth. A chair edge, a plant, or a counter in the foreground adds dimension.
Warm it up. Plants, books, art, and a few imperfect details turn a showroom into a home.
Common Interior Rendering Mistakes
Blown-out windows. This is the most common interior tell. The exposure gap between a bright exterior and a dimmer interior needs to be managed, not ignored.
Flat, single-source lighting. One overhead light makes every room feel like an office, so layer it instead.
Clashing color temperatures. Warm lamps fighting cool daylight fighting a greenish downlight breaks the illusion.
Wide-angle distortion. Over-wide lenses bend the room and exaggerate proportions, so pull the field of view back.
Sterile, empty rooms. Unfurnished spaces feel lifeless and make scale impossible to judge, so stage them.
Wrong-scale furniture. An undersized sofa or an oversized island throws off the entire sense of proportion.
Nonsensical reflections. Mirrors and glossy floors that reflect things that aren't in the room shatter believability instantly.
Showroom perfection. Real rooms have a thrown blanket, a stack of books, and a slightly-off cushion, and too-perfect interiors feel uninhabited.
Interior Rendering Software Options
Traditional and Real-Time Renderers
V-Ray sets the industry standard for photorealism. It has a steep learning curve but produces exceptional interior light.
Corona runs simpler than V-Ray with comparable quality, and it's especially popular for interiors.
Enscape integrates directly with Revit, SketchUp, and Rhino, and it stays fast and intuitive for walkthroughs.
Lumion offers real-time rendering with a large furniture and material library.
D5 Render delivers real-time rendering with strong interior lighting and a good free tier.
Twinmotion is free for non-commercial use and brings Unreal Engine quality.
AI Renderers
ArchRender renders from a single image upload, or it imports your full 3D model (OBJ, FBX, GLB) to generate multiple interior angles from one upload while preserving your actual layout. Compare options in our best AI architectural rendering software guide.
AI interior-design apps reimagine a room from a photo. They're useful for inspiration, but they generate a new space rather than render yours.
Screenshot-based AI tools take a 2D export and return a rendered version of that single, fixed view.
Getting Started with Interior Rendering
If you're new to interior rendering, here's the fastest path to results.
If you don't have a 3D model, AI tools (ArchRender included) let you upload a photo or screenshot and see a room rendered in minutes, with no modeling required.
For production work, start with a real-time renderer like Enscape, D5, or Lumion. The learning curve is manageable and the results are client-ready.
For maximum quality, invest time in V-Ray or Corona. The ceiling is higher, especially for interior light, but so is the time cost.
For efficiency at scale, tools like ArchRender that import 3D models directly eliminate the export-render-repeat cycle that makes multi-angle, multi-room interior work so slow.
Whatever path you choose, interior rendering has never been more accessible. The distance between a rough idea and a photorealistic room keeps shrinking, and for the increasingly common case of needing several honest views of a space you've already designed, importing the real model beats re-exporting screenshots every time.
Ready to try AI-powered interior rendering? ArchRender imports your 3D models and generates photorealistic interiors from any angle in seconds, with no GPU hardware or rendering expertise required.